SSO - SAML
A-Ops supports SSO using SAML allowing users of your tenant to login using a SSO provider instead of the local A-Ops user. Supporting multiple authentication types means that A-Ops does not require all users to be SSO users and Admin users within A-Ops can therefore pick and choose. Additional, multiple SSO providers are supported.
Authorization remains unchanged and users must still be added into the account management pages along with their assigned groups just like local users.
Tenant Configuration
- Open Model Editor -> Settings
- Create a new setting called
web-authif it does not exist otherwise open the existing one - Within
valueswe need to create anssokey - Insert the required SSO provider details using the sample below
Sample
Sample value json - please append this to your existing settings within web-auth if it already exited.
{
    "sso" : {
        "[sso_name]" : {
            "certificate":"[provider_cert]",
            "issuer":"https://prod-eu-west-1.a-ops.cloud/sso/saml2/[tenant_id]/[token]",
            "login_url":"[login_url]",
            "token":"[token]",
            "type":"SAML2"
        }
    }
}
| Parameter | Description |
|---|---|
| [sso_name] | A key name given to this SSO provider, the name can be anything |
| [provider_cert] | The public certificate from your SSO provider. The certificate must have the new lines replaced with \n |
| [tenant_id] | Tenant ID that can be found within the license section of the A-Ops protal |
| [token] | A secure token value we reconmend atleast 32 charators |
| [login_url] | The login url provided by your SSO provider |
{
    "sso" : {
        "azure":{
            "certificate":"-----BEGIN CERTIFICATE-----\nMIIC8DCCAdigAwIBAgIQn1/zXzkdwpeF7zP9t9nXie7ap2PcmWab3qdixE1qR8kge5QEJZzyxVmF\nk80iVCZkCCVgfnExXsgWW0zWOSzAuMJxu1hN27jQNz5jdbUWGCjnNs08Ps8iHKI4v8RucsJclXYS\nm3rolZYjFeHAHvnwq398\n-----END CERTIFICATE-----\n",
            "issuer":"https://prod-eu-west-1.a-ops.cloud/sso/saml2/6405d17bb432ab8cf184eec4/edfdgdfn32488sdmnlzmsdjeqwodjsdf3234382fnladaoew",
            "login_url":"https://login.microsoftonline.com/18bv3dea-54bd-465a-9eb8-f2bg75e346f/saml2",
            "token":"edfdgdfn32488sdmnlzmsdjeqwodjsdf3234382fnladaoew",
            "type":"SAML2"
        }
    }
}
Microsoft Entra
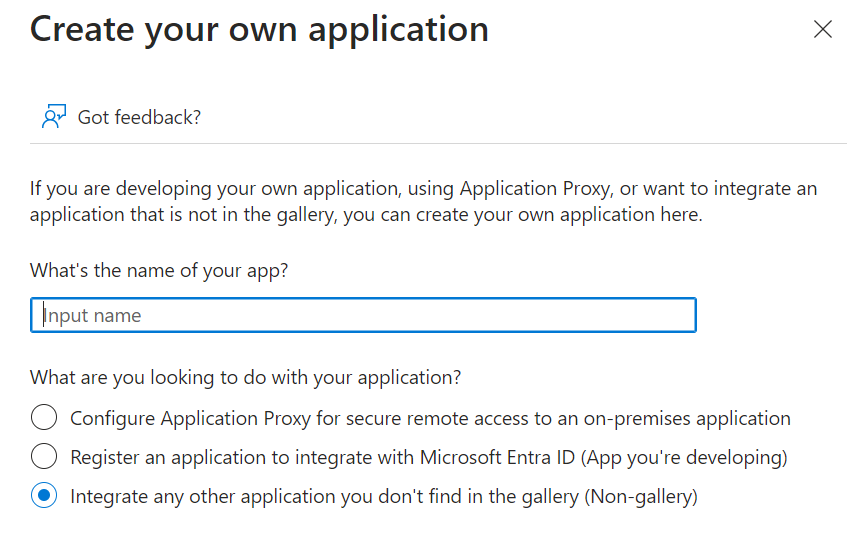
Within the Entra console we need to create a new Enterprise Application which can be done following these steps.
- Applications -> Enterprise Applications
New ApplicationCreate your own application- Enter a name for the application e.g.
A-Opsand pressCreate

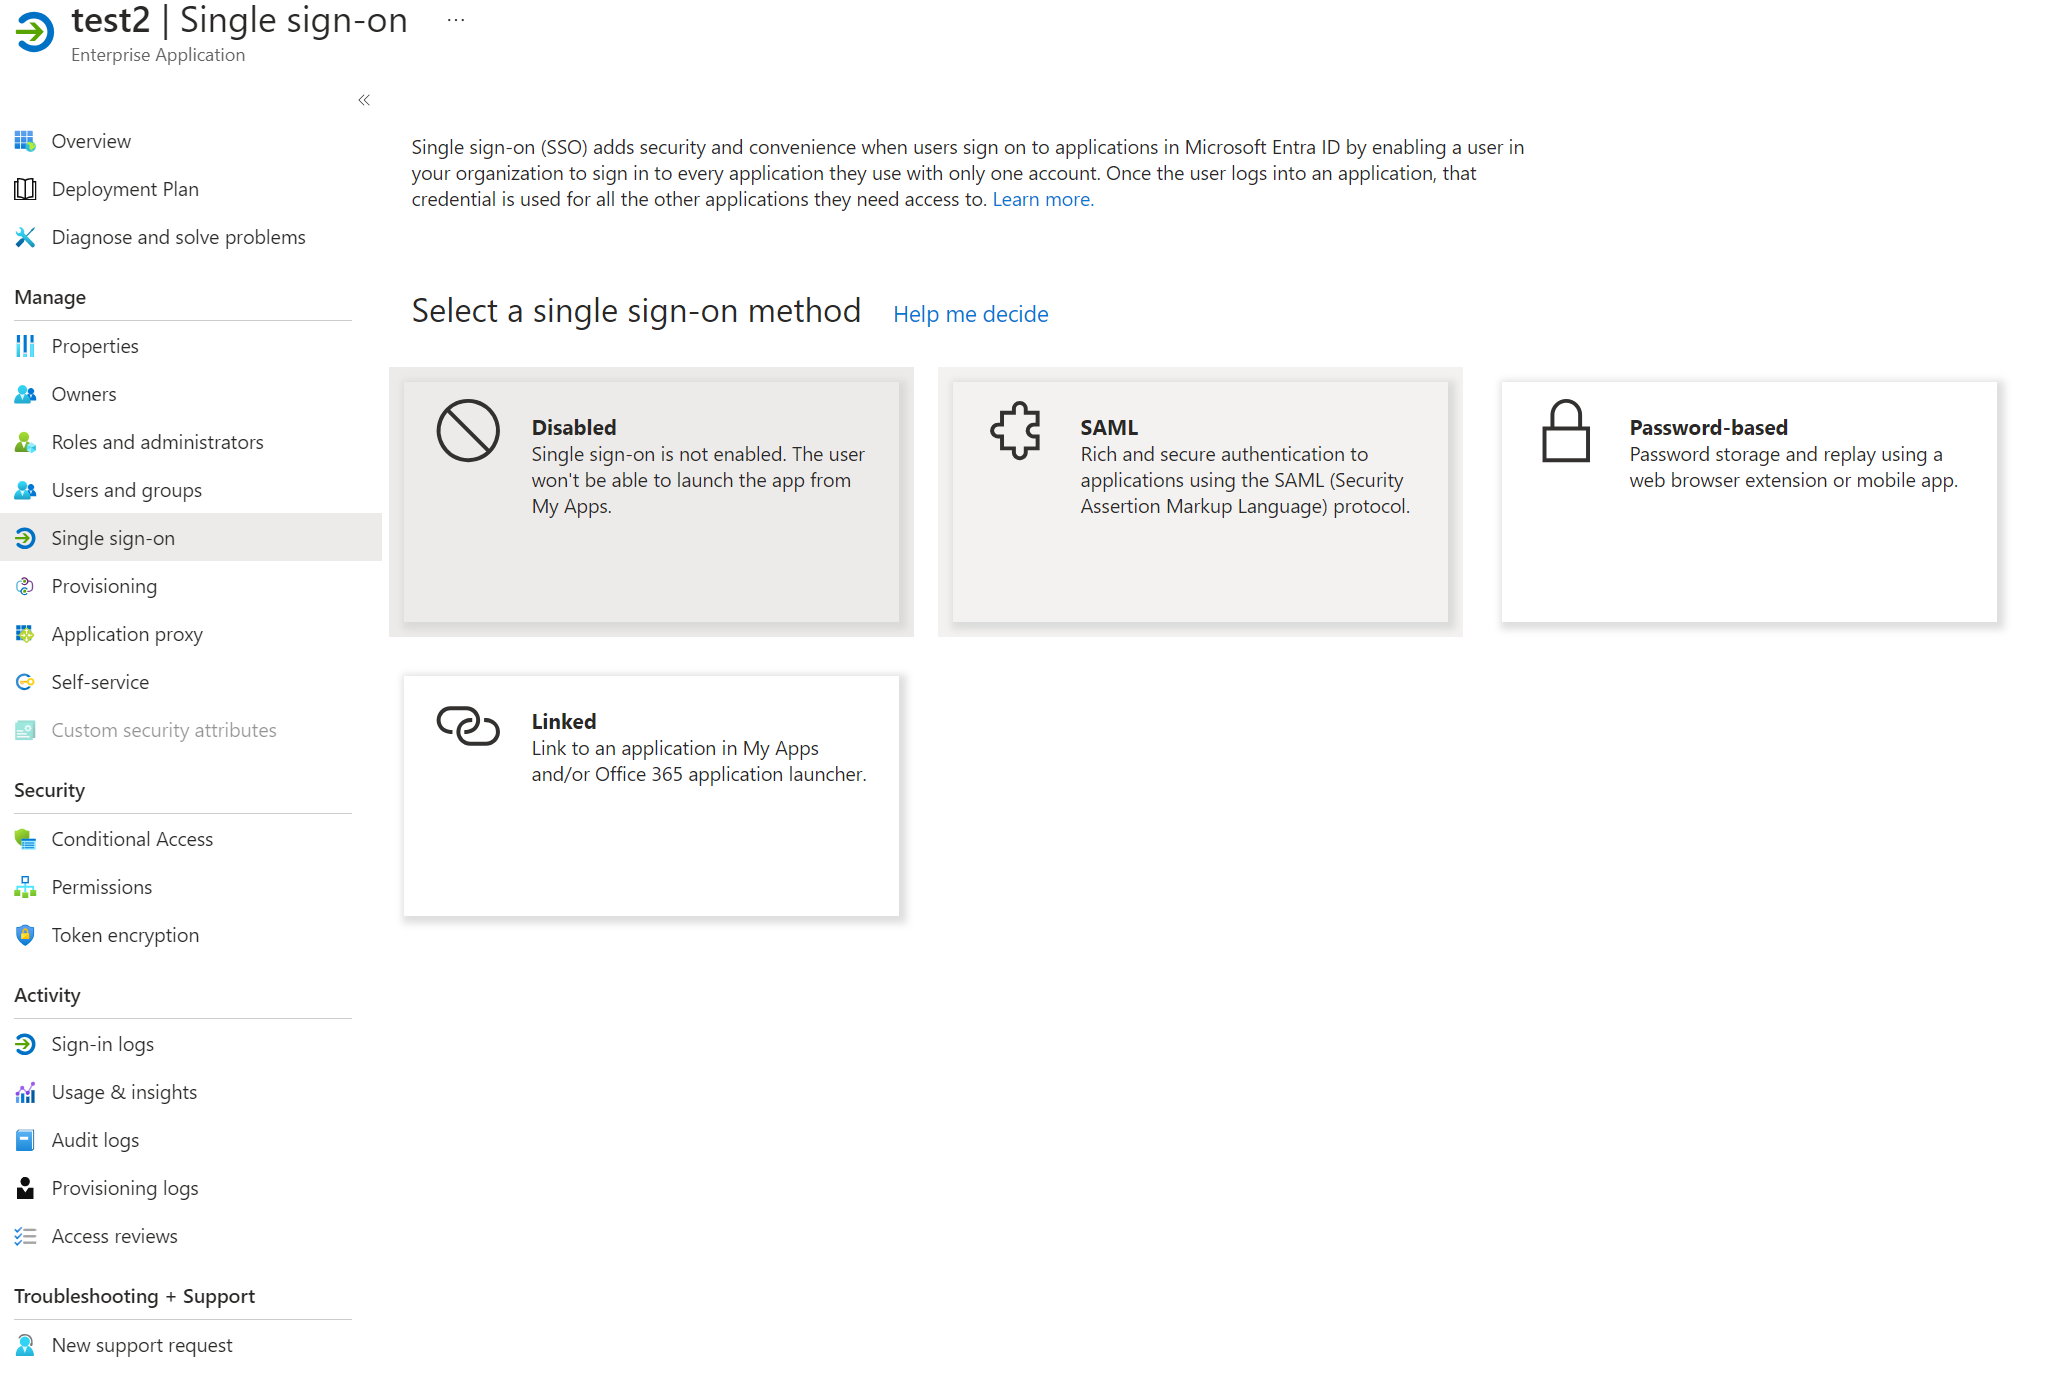
- Select
Single sign-onand thenSAML

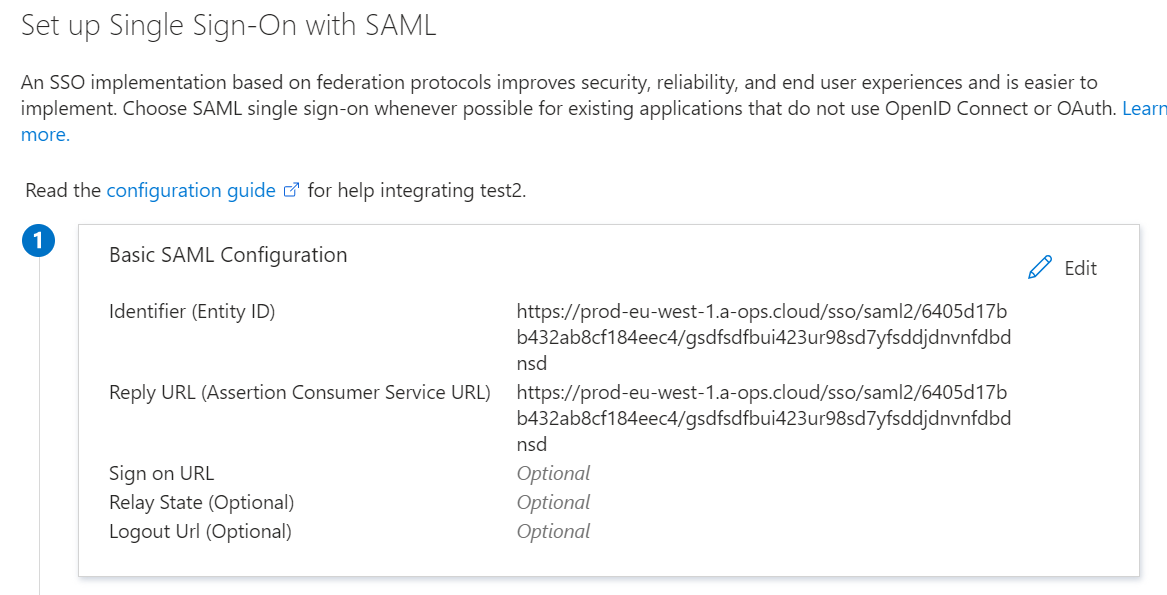
- Edit
Basic SAML Configuration - Enter into
IdentiferandReply URLthe following valuehttps://prod-eu-west-1.a-ops.cloud/sso/saml2/[tenant_id]/[token]

- Copy and make a note of the
Login URL - Download
Certificate (Base64) - Populate the SSO SAML template
{
    "sso" : {
        "entra":{
            "certificate":"-----BEGIN CERTIFICATE-----\nMIIC8DCCAdigAwIBAgIQn1/zXzkdwpeF7zP9t9nXie7ap2PcmWab3qdixE1qR8kge5QEJZzyxVmF\nk80iVCZkCCVgfnExXsgWW0zWOSzAuMJxu1hN27jQNz5jdbUWGCjnNs08Ps8iHKI4v8RucsJclXYS\nm3rolZYjFeHAHvnwq398\n-----END CERTIFICATE-----\n",
            "issuer":"https://prod-eu-west-1.a-ops.cloud/sso/saml2/6405d17bb432ab8cf184eec4/gsdfsdfbui423ur98sd7yfsddjdnvnfdbdnsd",
            "login_url":"https://login.microsoftonline.com/185bbdda-41bd-481a-9fb8-f2bc75ef2c54/saml2",
            "token":"gsdfsdfbui423ur98sd7yfsddjdnvnfdbdnsd",
            "type":"SAML2"
        }
    }
}
Enable SSO for Users
- Within Account Management in A-Ops edit or create a new user that you wish to enable SSO
- Ensure the username matches your SSO SPN normally your email
- Edit the user and update the
Login Typeto sso-'[sso_name]'

- Press
Update User
